The Settings tab in the left navigation pane lets you manage various aspects of your account and manage what is displayed to users. We are updating these features to give you more cool tools – so the image and information below may be slightly different when you log on.
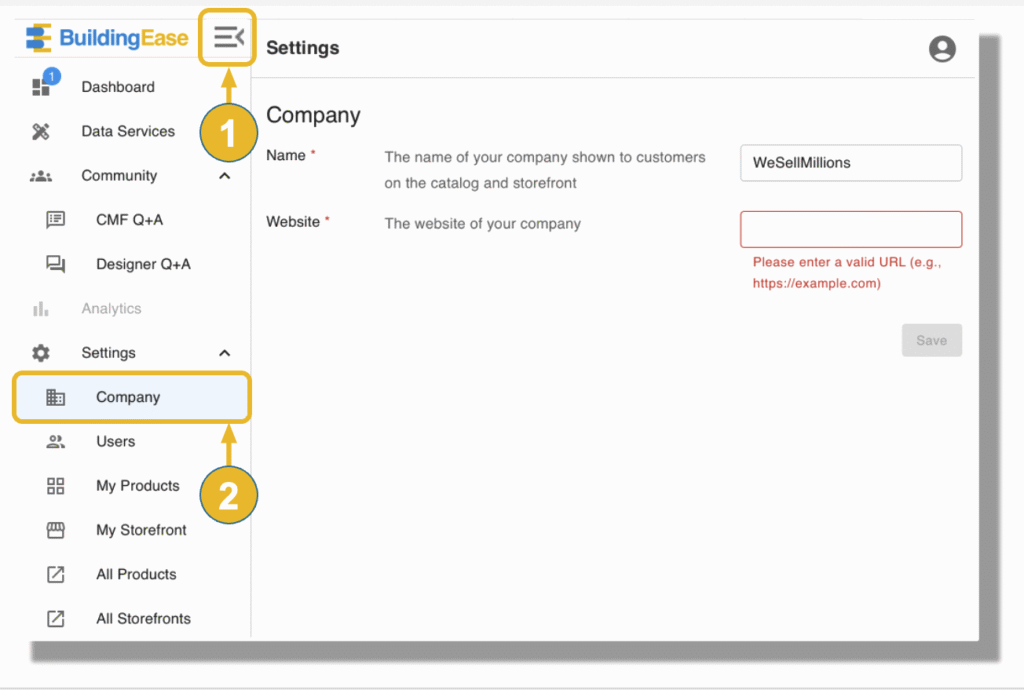
1.) HIDE / SHOW: You can always hide the side navigation pane by clicking on the icon next to the BE logo (you may have to hover over that area to make it appear if you don’t see it!).
2.) CLICK ON “COMPANY”: in the side navigation pane and fill in the name and URL for your company. Please make sure the name is represented EXACTLY as it should be, considering spaces, commas, dashes and all spelling options. We know that this is not always straightforward if you have different divisions or variations by country – just email us at [email protected] and we’ll work with you to make sure you’re represented appropriately.
NOTE: This may not sound important, but it is! Certifications often have different spellings of the same company and as we continue to fix your name in various places, we want to make sure it gets changed to the way you spell it here!
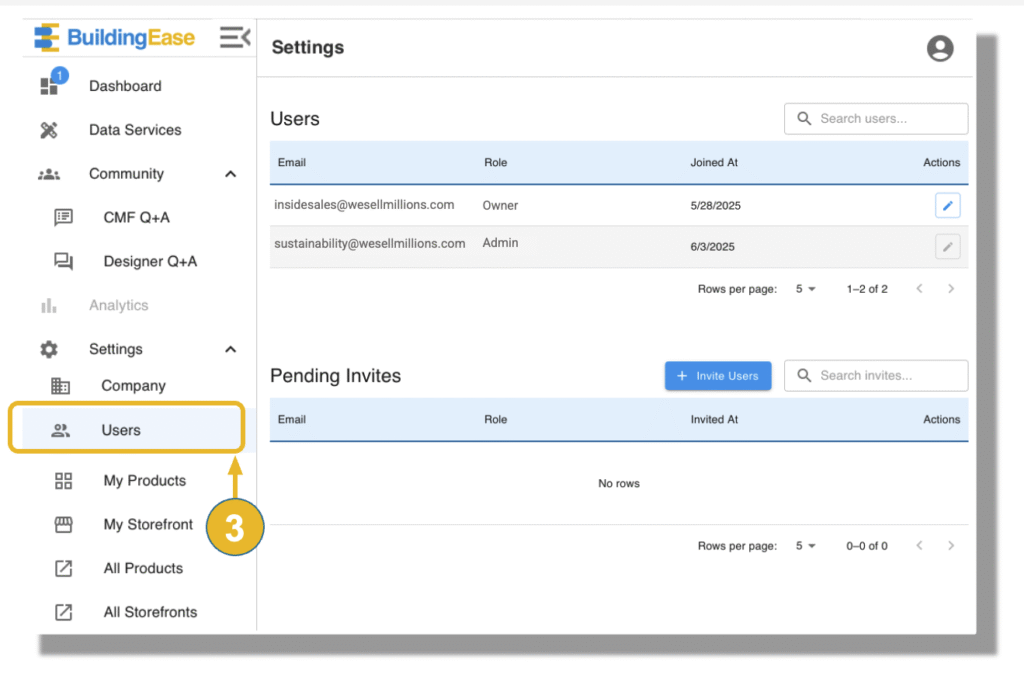
Next, click on 3.) USERS: to add others from your team. You can do this at any time. Once you add their information, they will get an automated invitation to their work email.
Products and Storefront are part of your Account Settings, but go to the next sections to find more details.
MY PRODUCTS / STOREFRONT: That’s where you manage your own product information.
ALL PRODUCTS / STOREFRONTS: This is where you can see our entire catalog and Galleria of storefronts (a new addition!)


